Julie Kardatzke Architect, LLC
608.588.7105
  • About
    • Design Philosophy
    • sustainable building
    • MY STORY
  • Portfolio
    • NEW HOMES
    • Additions / Remodels
    • Non-Residential Buildings
  • THE DESIGN PROCESS
    • GETTING STARTED
  • Resources
  • Blog
  • TESTIMONIALS
  • Contact
  • Non-clickable Page

Gardening with Native Plants & Belated Happy Earth Day!

4/23/2024

0 Comments

 
Picture
Last fall, my husband and I decided to remove several overgrown evergreen trees and bushes in our yard, leaving some large bare areas where weeds are happily sprouting up now.  We've decided to fill the gaps in our gardens primarily (although not exclusively) with native plants.  We're hopeful that native plants will provide a supportive habitat for birds, bees, butterflies and other animals.  We're also hoping that, once established, the native plants will require minimal maintenance and be resilient in the face of droughts and extreme heat.

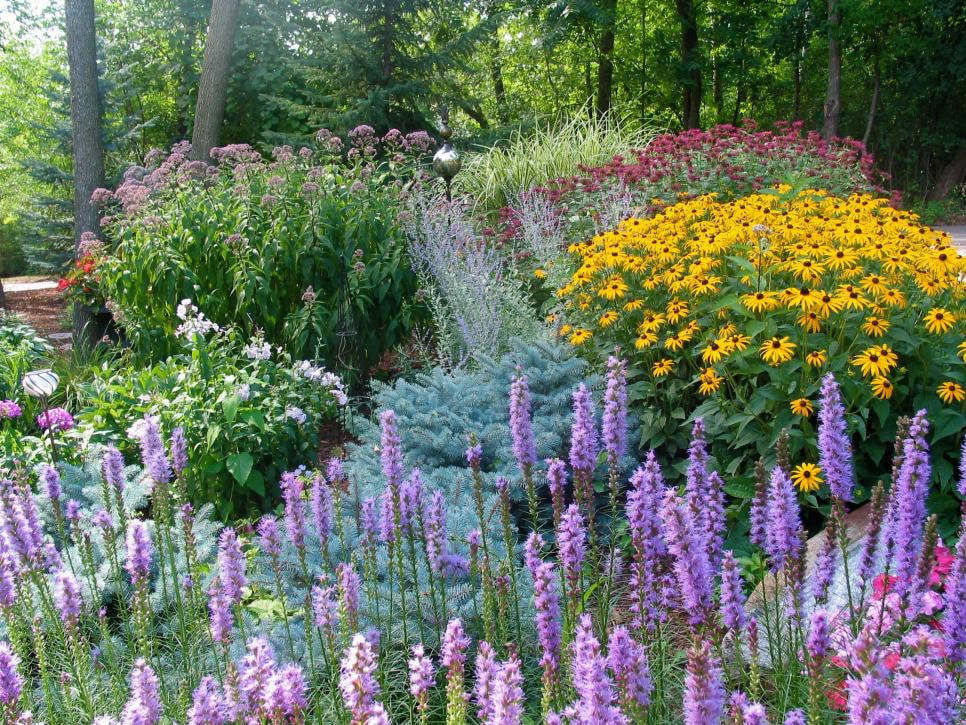
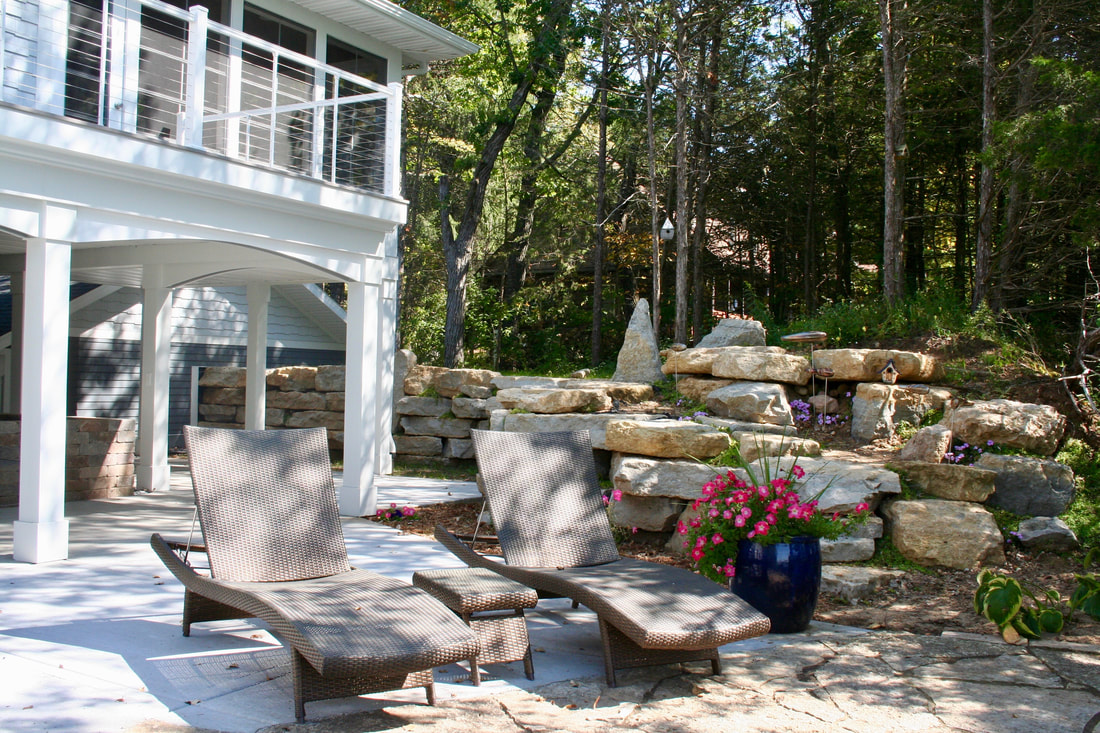
I'd love to be able to achieve a look of abundance similar to the photo above (that photo is not of our yard.)

John Pohl, of Folly Afield LLC, located northwest of Spring Green, will be designing and installing our new beds.  We're excited to see what he comes up with!

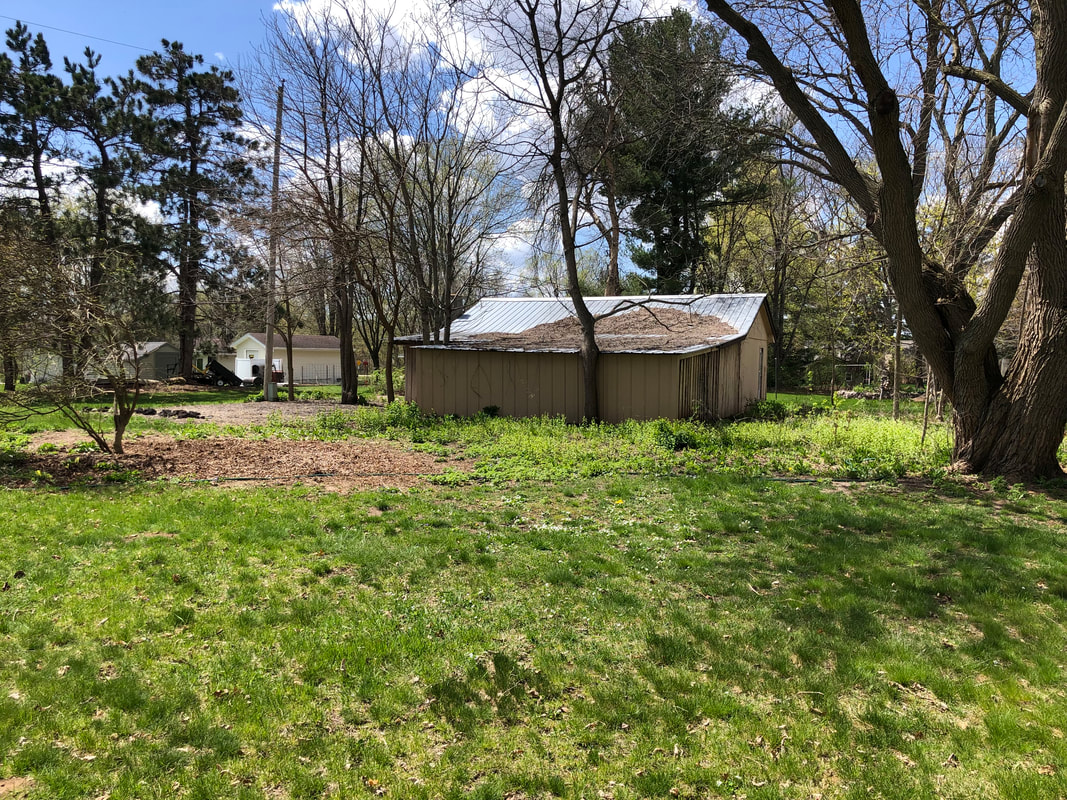
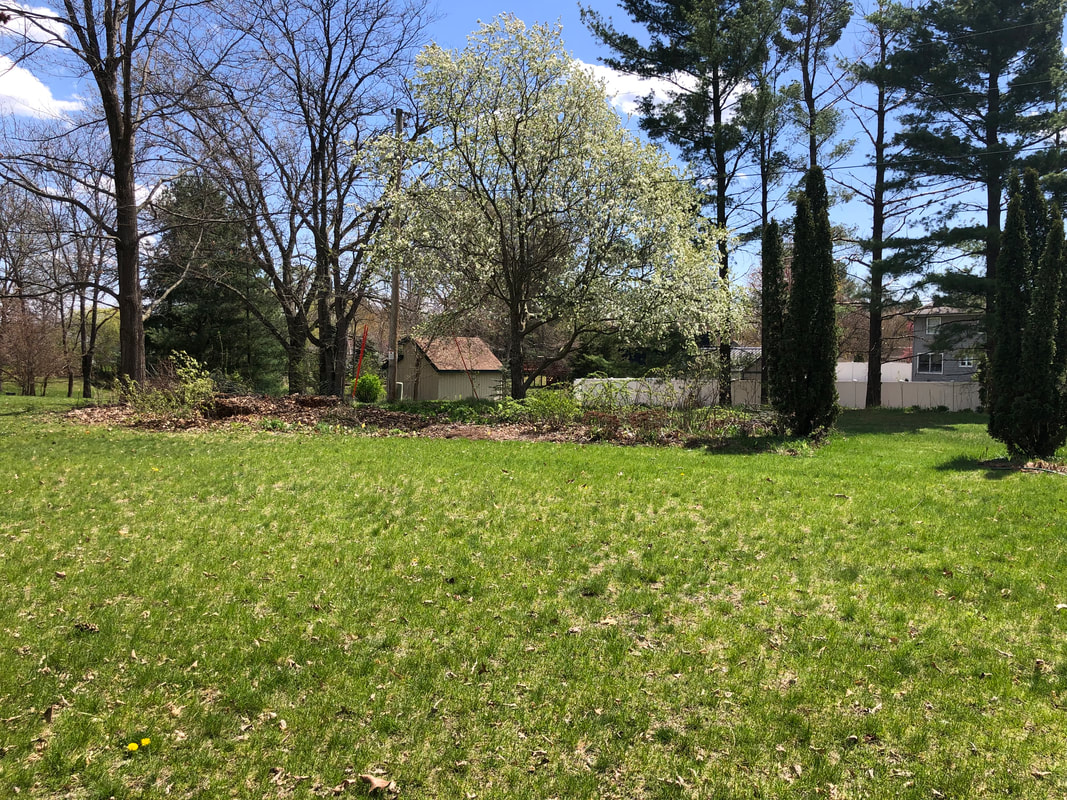
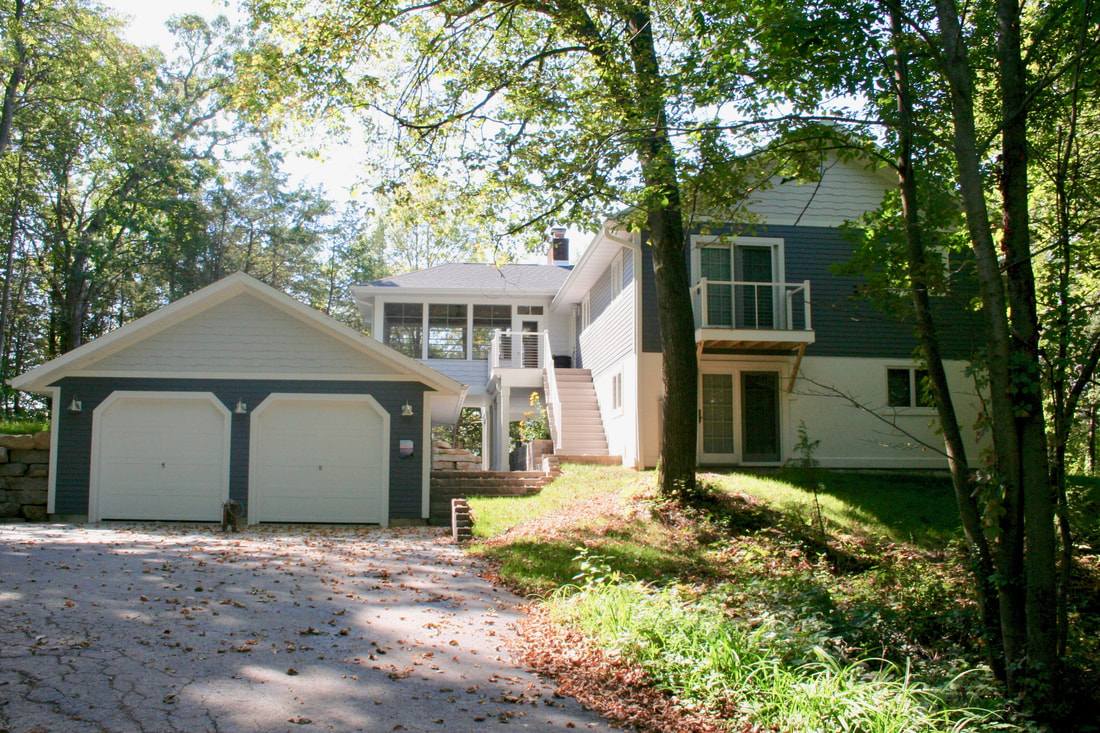
Below are a couple of photos showing the two corners of the yard where the trees and bushes were removed.  I plan to post again to provide updates as things progress.

Picture
Picture
0 Comments

Building On a Steep Site

6/3/2022

0 Comments

 
Picture
In recent years, I've had many clients who have steep rural sites that they would like to build on.  In a previous blog post called Driveways for Steep Sites, I wrote about the challenges of putting a functional driveway on a steep side.  This post will talk more about the house itself, specifically houses built on the side of a steep hill.

What is meant by a steep site?  Although the definition can vary, I'm referring to a site with a grade of 20% or more.  

​The following recommendations are based on what is most natural and therefore most affordable to build, not on what CAN be built.  Most things are possible to build with enough money. 

GARAGE LOCATION
First of all, let's consider the garage.  If the site is uphill from the public road, then it makes sense to put the garage on the lowest level of the house (what would be considered a walkout basement) because it will be easier to get a driveway to that level.  This will reduce the length of the driveway and the amount of grade that it has to climb.  This can work well if you plan to have the main living spaces (e.g. the family room, kitchen, dining room, etc.) in the walkout basement level of the house.  In homes where the living spaces are on the level above the garage, owners may want to plan for a future elevator in case they have difficulty walking up stairs as they age.

If the site is downhill from the public road, then it makes sense to put the garage on the uphill side of the house, again in order to reduce the length of the driveway and the grade change.  I find this to be a more desirable situation, since most people prefer to put the main living spaces completely aboveground, and there will likely be better views from this level as well.

LEVELS AND ORIENTATION
It naturally makes sense to have a walkout basement if one is building on a steep hill, since the downhill side of the house will be exposed. This can be especially beneficial if the hill faces south, as both levels will get southern exposure and heat from the sun in the winter.

When building on the side of a hill, it makes sense to keep the home rather narrow in the steep direction and orient the long faces parallel to the contours of the slope.  This minimizes the change in grade around the perimeter of the house and therefore the need for retaining walls.  Retaining walls can be a beautiful way to integrate a home into its site, but homeowners should be aware that they will be an added expense that won't be included in the cost to build the house itself.

Another option is to have multiple levels which step down the hill to follow the grade, but that strategy will increase the amount of foundation and roof area, therefore increasing the cost of the house.  Multiple levels can also be difficult to design without the roofs of the lower levels blocking the views from the upper levels, unless flat roofs (maybe with rooftop terraces incorporated into them!) are used.  

The least natural option is to build a house which runs perpendicular to the hill's contours and will require either that the home be pushed back into the hill or that retaining walls be used to hold the ground up around the foundation walls.

OUTDOOR SPACES
Patios or other outdoor spaces that sit directly on the ground work best when they are next to the house (with a retaining wall to hold up the ground) or behind it on the uphill side of the home.  Decks can, of course, be used to create outdoor spaces on the downhill side of the house but will shade the areas below them and may look awkwardly proportioned if they sit too far above the grade.

GRADING, STRUCTURE AND RETAINING WALLS
It's important that the ground on all sides of a house is sloped away from the house so that rainwater isn't directed into the house.  On the uphill side of the home, that often requires retaining walls to hold the dirt back away from the house.  Steeper hills will require more and/or higher retaining walls than less steep hills.

Structurally, the foundation of a home built on a steep hill may require additional reinforcing and concrete to resist the weight of the ground pushing against the uphill side of the house or may require special foundations.  The higher and longer the wall which is underground, the greater the force upon the wall, wanting to tilt it over.

EXCAVATION AND CONSTRUCTION COSTS
Finally, construction itself may be more expensive on a steep site.  It is more difficult to move equipment around a steep site, to bring materials up or down the hill and to construct the home when there is no flat area to work on.  The general contractor may even have to rent special equipment.


Steep sites can certainly be used to build a new home, but the owner of such a property should be aware of the special challenges and additional costs that will likely come with developing that site.  Tailoring the design of the home to work WITH the grade rather than against it will help to reduce those costs to some extent.
0 Comments

Animated Renderings

3/26/2021

0 Comments

 
3D animations can be very helpful in understanding what a new home will look like, before it is built.  3D still views can help a lot, but being able to "walk through" or "fly around" a building is even more valuable.  I've been experimenting with my CAD software's ability to generate 3D animations.  I can walk through the interior of a home or fly around the outside of it, and I'd like to start offering these views to my clients.  The difficult decision is always how much detail to put into the animations.  The more detail and nuance, the more time it takes to create the CAD model, and the longer it takes to render it.  In my CAD program, Vectorworks, adding lighting to the drawing, in particular, dramatically increases the size of the rendering but also creates a more interesting and lifelike animation.  

For now, at least, I plan to offer fairly simple animations with a limited amount of detail, that will give clients a good sense of what their new home will look like on the inside and outside but will certainly not be considered photorealistic.  I can add more detail and complexity to animations for clients who are interested in paying for that level of detail.

Below are a flyaround and a walkthrough of a current project that I did as experiments.  The videos can be paused at any point to take a longer look at a particular area.


0 Comments

Building Your Home on a Rural Site

11/19/2020

0 Comments

 
Picture
Many people dream of building a home in the country, perhaps after they retire and are no longer tied to a place of work.  Whether looking for a quieter, simpler lifestyle or wanting to move to a location with a lower cost of living, anyone contemplating such a move should be aware of some differences between living in the country and living in a city or suburb.  Here are some things to think about if you are considering building a home in a rural area.

LIFESTYLE
Many rural townships require a minimum lot size in order to maintain the rural character of the area by preventing the development of farmland into subdivisions.  A common minimum lot size is 40 acres, and many townships allow only one home on a property, with the exception of additional homes that will be used by family members who are helping to farm the land.  There may be a requirement that part of your land by preserved as farmland.

If you are building in an area with farms, think about how you will feel about normal farming activities that may occur on your neighbors' property.  During the spring, summer and fall, farmers may start planting or harvesting early in the morning or continue late into the night, in order to beat the weather.  In addition to noise, there may be smells associated with farms, particularly those that raise livestock. 

Many rural citizens like to hunt or allow other people to hunt on their land.  How do you feel about hearing gunshots from your home?  Rural land (and roads) may be used by snowmobilers in the winter and by owners of 4 wheelers the rest of the year.


BUILDING COSTS
Depending on how close to the road you build your home, you may need a much longer driveway than you would require in the city or suburbs, which can add tens of thousands of dollars to the cost of building your home.  Someone will have to plow the driveway as well, meaning you may need to purchase a plow attachment for your pickup truck or hire someone to plow for you.  

Most rural sites need to have a septic system and well, since they are not hooked up to a city's sanitary sewer and water supply.  Electricity may need to be brought from quite a distance to get to your home, depending on where on your property you plan to build.  These things generally add tens of thousands of dollars to the cost of construction.

There will likely be fewer general contractors to choose from to build your home, especially if you are far from a city.  Materials may need to be brought from a longer distance, increasing delivery costs, especially for unusual materials or products.  If you're building on a challenging site or in a hard-to-reach spot, that could increase costs for labor and equipment.


COMMUNICATION AND TRAVEL
Unfortunately there are still many rural places in the United States that do not have good wifi or cellular coverage (or the wifi may be very expensive).  This may be of particular concern if you are planning to work from your home and need to be able to reliably communicate with others.

Running to the grocery store to pick up a few things may require a long drive there and back.  If you have children, they may have a long bus ride to get to school, or you may choose to drive them to school and pick them up at the end of the day.  


VACATION HOME
If you're building a vacation home in the country, you may want to consider a security system that will alert you of intruders or burst plumbing pipes.  Some people hire a caretaker to check on their property regularly and take care of any problems.  If you won't be living in the home over the winter, you will need to either drain the water in your house, or keep the heat turned up high enough that the pipes won't freeze.
​

LIVING NEAR THE WATER
Lakes, rivers and wetlands can be beautiful features on a site, but they also come with restrictions determining how close you can build, both to protect your home from flooding and to protect the water quality, habitat and scenic beauty of the area.  In Wisconsin, buildings are generally not allowed within 75 feet of the water.  Sites that are downriver from a dam may have a "dam shadow" that they cannot build within.  This is an area that is expected to become flooded if the dam breaks or is opened.    

In addition, water may affect where you can place your septic system and well.  High groundwater may determine whether or not you can build a basement under your home.  In order to limit runoff from your site into a lake, there will likely be a limit to the amount of "impervious surface", such as buildings, patios or driveways, that you're allowed to build on your lot.  Your county zoning office will be able to tell you whether a property is located within a "shoreland/wetland" or "floodplain" district.


Owning a house in the country can be incredibly enjoyable, but it's important to know the tradeoffs before buying land and starting the process of building.

0 Comments

The Importance of Ordinance Review

3/6/2020

0 Comments

 
Picture
Before even beginning design of a new project, it's important to know what the legal limitations of your site are.

  • What zoning district is your property located in?
  • What are the required setbacks for your zoning district?  Height limitations?
  • How many accessory structures (such as sheds or detached garages) are you allowed, and what are their location and size limitations?
  • Are you allowed to have more than one dwelling unit (house) on your property?
  • Is your site property on the lakefront or contain another navigable body of water?  If so, you will need to build at least 75 feet from the ordinary high water mark (in Wisconsin).  Lakefront property can be tricky because it is also limited in how much of the property can be covered by "impervious surfaces" such as paving or decks.
  • Is your property located within a flood plain?
  • What type of road is your property adjacent to / accessed from? Required setbacks from state and federal highways are greater than required setbacks from county highways, which are greater than required setbacks from local roads.

Here are some examples of important site information that was uncovered during zoning research for my projects:
  • Clients planned to build a second residence on their lot.  Zoning research revealed that their property was limited to one dwelling, and they would have to subdivide their property in order to build a second building.
  • Clients planned to turn their walkout basement into a separate rental unit.  It was found that the zoning ordinance allowed them to take in boarders (who would share their living space) but not to have a separate rental unit.  
  • The Owner wanted to build a duplex on their lot, but the zoning ordinance only allowed single family homes as a permitted use.  They were able to get a duplex approved as a conditional use.
  • The property was located in a large-lot subdivision, near the intersection of two streets.  For safety and visibility, the driveway needed to be located a certain distance from the intersecting road, which impacted the approach to the house and therefore the layout.
  • A previous owner had built an addition that was partially in the required setback.  The lot was therefore nonconforming and the owner would need a variance in order to make any changes to the exterior of the house.  I was informed that it was unlikely that the variance would be granted, and the current owners decided not to pursue changes to the existing house.
  • A vacation home located on the shore of Lake Wisconsin had a small narrow lot, and the existing house and deck covered the maximum allowable amount of impermeable surface area.  Any remodeling to the exterior, including adding a deck, patio, sidewalk or driveway, could not increase the amount of impermeable surface.
  • Research uncovered that the site was affected by the "hydraulic shadow" of a dam which was located miles away from the property.  Any addition built within the hydraulic shadow would need to be at a high enough elevation that it would not get flooded if the dam should fail.
  • In the process of zoning research, I discovered that a property sale had not been properly processed, and my clients were not legally the owner of the property, even though the deed said that they were.  I recommended that they contact their attorney to correct the situation.

It's good to know what types of structures and how many are allowed on your site, preferably before you even buy the property.
​ 
If any new construction (new home or addition) will take place close to any of your property lines, it would be a good idea to have a survey of your property done.  It sometimes happens that property lines are not located where owners think that they are, and it's better to find this out early in the design process.

Your municipality (city, village, or town) can be very helpful in providing information about your property.  It's good to contact them early when you are considering a building project.  If your property is in a village or township, the county zoning office may be the first one you should contact.

0 Comments

Choosing Your Contractor, Part 2:  The Contract

6/5/2019

0 Comments

 
In last month's blog post, I discussed how you can go about finding and choosing a general contractor for your project.  This month will explore the contract for construction itself.  First let's look at how contractors typically get paid.

HOW CONTRACTORS GET PAID
The most common way that contractors bill for their work is with a fixed-price bid which includes the cost for labor, materials, products and markup (the contractor’s 20- to 25- percent fee, which pays his overhead and his salary) for each phase of the job.  

Some contractors prefer to work on a time and materials (T&M) basis.  Instead of a set price, they charge as they go for the cost of labor and supplies, plus a markup.  Working on a time and materials basis, you pay only for the hours worked and the materials used, but it means less certainty about the final cost of the project.

The T&M contract may be especially appropriate for a project where there are a lot of unknowns,  such as a remodeling project where you’re uncertain what the contractor may find once he starts opening up the existing house.  An unscrupulous contractor can use a T&M contract to work slowly and pad his fee, so never sign a T&M contract unless it has a price cap (T&M, not-to-exceed contract).

THE CONTRACT
Once you've selected your general contractor, he or she should present you with a contract.  For the protection of both you and the contractor, always have a written contract. It should be clear and concise and should lay out all of your expectations and understandings about the job.  Do not sign anything until you understand it all. You may want to have your attorney review the contract before you sign it.

The contract should include:
  • the contractor’s name, physical address, phone number and license number
  • the scope of work, as detailed in the architectural drawings and specifications, including each material used and each product’s model, size and brand.  If some materials will be chosen later, the contract should say who’s responsible for choosing each item and how much money is budgeted for it (allowances)
  • the itemized bid (if you are using a fixed-price contract)
  • estimated project start and end dates 
  • any agreements you’ve made (e.g. when the workday starts, who is responsible for getting necessary permits, or whether the contractor is responsible for trash hauling and clean-up work)
  • a statement explaining any warranties on materials, labor or services (be sure you understand any exceptions or limitations)
  • the payment schedule for the contractor, subcontractors and suppliers
  • how changes orders are handled
  • a requirement that the contractor obtain lien releases from all subcontractors and suppliers
In addition you should get a list of subcontractors and proof of insurance.


THE PAYMENT SCHEDULE

A contract for construction should include a payment schedule.   The contractor may ask for an initial down payment.  After that, the contract should call for progress payments - that is, installments made when certain predetermined parts of the job (framing, mechanicals, drywall) have been completed to your satisfaction.  Never let the dollars get ahead of the work, so that you’re not paying out money for work that hasn’t been finished.   The final payment (retainage) should be at least 10 to 15 percent of the total cost.  
Before you sign off and make the final payment, check that:
  • all work is complete and meets the standards spelled out in the contract
  • the contractor has given you all of the product manuals and warranty certificates
  • you have proof that all subcontractors and suppliers have been paid (via lien waivers)
  • the job site has been cleaned up and cleared of excess materials, tools and equipment

The general contractor should give you lien waivers each time he is paid, as proof that he has in turn paid his subcontractors and suppliers for their labor and materials. If you pay the general contractor, but he fails to pay his subcontractors or suppliers, the subs or suppliers can put a lien on your home.

KEEP RECORDS

Before, during and after construction, keep all paperwork related to your project in one place.  This includes:
  • copies of the contract
  • change orders
  • any correspondence with your home improvement professionals
  • a record of all payments - you may need receipts for tax purposes
Keep a log or journal of all phone calls, conversations and activities.  You may also want to take photographs as the job progresses.  These records are especially important if you have problems with your project - during or after construction.


0 Comments

Choosing Your Contractor, Part 1

5/15/2019

1 Comment

 
It’s important to find the right contractor for your project, one whose skills and experience are a good fit for your project, and someone whom you can trust and feel comfortable working with.  Many contractors have a specialty, for example new homes, remodeling, or historic preservation.  Some are accustomed to working on fairly simple homes; others have experience building challenging homes which require a lot of craftsmanship and attention to detail.  You’ll want a contractor who has experience on projects similar to yours.  

If you plan to build using an uncommon material or building system (e.g. timber frame construction, SIP panels, straw bales, ICFs) or want a highly energy efficient house (e.g. built to Passive House standards or using double stud walls), you’ll want a contractor who has experience building with those materials / systems.


FINDING PROSPECTIVE CONTRACTORS

Talk to friends, neighbors and co-workers who’ve done home construction projects.  If you can, take a look at the work done and ask about their experience.   You might try asking for recommendations from the local building inspector, who'll know which contractors routinely meet code requirements, or pay a visit to your local lumberyard, which sees contractors regularly and knows which ones buy quality materials and pay their bills on time.  If you’re doing a remodeling project, check with the National Association of the Remodeling Industry for a list of members in your area (nari.org).  To find builders in your area that are members of the National Association of Home Builders, visit nahb.org. 


DO YOUR RESEARCH

Once you’ve got names of potential builders, it’s time to research them. Look at the Better Business Bureau website for information regarding complaints. Keep in mind that a complaint is not necessarily proof of a bad act on the part of the contractor, but a slew of complaints can signal potential difficulties with the contractor’s services.
 

Check out a contractor’s reputation on online rating sites you trust.  Do people seem to have similar experiences, good or bad? 


TALK TO THE CONTRACTOR

Now that you’ve done the initial vetting of prospective contractors, it’s time to contact those who’ve made the cut.  Give each prospective contractor a call.  Ask him questions.  (I have compiled a list of “Questions to Ask a Prospective Builders”, which I give out to clients.)

Ask for references from former customers of the builder, and randomly call several of those references, (although you should keep in mind  that the contractor is likely to “cherry pick” past customers and is unlikely to use an unsatisfied customer as a reference).  My resource “Questions to Ask Builders’ References” provides a helpful list.

Ask the contractor for a list of subcontractors normally used during projects. Contact the subcontractors and ask them about their experiences in working with the general contractor. Ask if they were paid promptly.  Ask them for any safety or ethical concerns and whether they're comfortable working with the contractor.

Ask the contractor for credit references from suppliers and call them to find out whether the contractor pays his bills on time.  


MEET THE CONTRACTOR

Assuming that everything has checked out well, meet with the prospective contractor face to face.  Is he easy to communicate with?  Does he inspire trust?  Is this someone that you’d like to work with over many months?

Visit a current job site and see for yourself how the contractor works. Is the job site neat and safe? Are workers courteous and careful with the homeowner's property?

Visit completed projects that the contractor has built.  Is the quality of construction good?


BID OR TO NEGOTIATE?

At this point there is one of two ways that you can go.  You can request bids from more than one contractor, or you can choose your favorite and ask that one for a proposal.  There are pros and cons to each method.  


IF YOU CHOOSE TO BID THE PROJECT

If you choose to bid out the project, now is the time to ask for bids.  It may be tempting to get lots and lots of bids, but it’s preferable to choose only three.  This will give you a fair sample to choose from without wasting the time of many contractors who have a small chance of seeing any payback for the many hours that it takes to put together a bid.  It will also be easier for you to make a decision if you don't have a multitude of bidders to choose from.

Give each prospective contractor a set(s) of drawings.  Ideally your prospective contractors will be bidding from a complete set of architectural plans and specifications that call out every detail of the project.  Otherwise each contractor will make his own assumptions about what you want, and the bids will be apples-to-oranges comparisons.   

Each bid should include a detailed breakdown of the cost of materials, labor, and overhead and profit.  With  luck, each contractor will have broken down his bid in a similar way to make it easy to compare, but it’s more likely that you will have to do some deciphering and ask some questions to figure out what is and isn’t included, and the cost of each item.  I have put together a spread sheet that I can use to help clients compare bids from different contractors.

ALLOWANCES:  If you have an abbreviated set of architectural plans or have not yet chosen all of the materials and products for your project, any items that haven’t been nailed down will typically be handled with an allowance, a dollar amount meant to cover, for example, the cost of your cabinets.   Be aware that allowances are often too low, which can result in an unpleasant surprise when you get the bill for the actual cost of those items.  Even if you aren’t ready to make a final selection of items, you can get a rough idea of their cost by going to the store or looking online to get a sense of the price range for the style and level of quality that want.  Don’t forget to include the cost of sales taxes and delivery charges for the items.


SELECT THE CONTRACTOR

Once you have all of the bids in hand, don’t automatically choose the lowest bidder.  Be wary of any bid which is much lower than the others.  A contractor whose bid is substantially lower than the others may have left something out of his estimate and may try to cut corners when he realizes that he can’t do the project for that price.  All else being equal, it's better to spend more and get someone who is competent, has a good reputation, communicates well and whom you’re comfortable working with.


NEXT:  CHOOSING YOUR CONTRACTOR, PART 2:  THE CONTRACT
1 Comment

'Tis the Season for Inglenooks

12/15/2017

0 Comments

 
Picture
This is the perfect time of year to enjoy a warm fire, and one of the coziest fire areas of all is the inglenook, which is defined as a corner or nook near a fireplace, often with seating.  Inglenooks combine the physical and visual warmth of a fire with a sense of shelter, a place to sit and look out into a larger room yet feel somewhat separated.  This is what Sarah Susanka in her book "Home By Design" and Christopher Alexander in "The Pattern Language" refer to as alcoves.  They note that we are psychologically attuned to feel comfortable in a place where we can survey what is happening around us from a well-protected place.

Here are four variations of an inglenook, shown in the same family room of an existing house, ranging in size and amount of enclosure.
Picture
The nook above is the least "inglenook-y" of the four examples.  It defines the space around the fireplace with small seats and windows on either side of it.  It takes up minimal space, and yet it declares itself slightly separate from the room in which it sits.
Picture
Inglenook #2, above, occupies the same amount of space as the previous inglenook, yet has a more sheltering feel because of the lowered ceiling above it.  Light sconces are a beautiful and practical touch which help to define the space with light and create a cozy place to read.
Picture
Image #3 above begins to look more like the traditional inglenook, with seats facing one another.  It requires more space than the previous two examples and includes built-in shelving flanking the fireplace.
Picture
Inglenook #4, above, has the most "inglenook-y" character of all.  Not only does it have seats facing one another, but it is further defined by columns, glass-faced cabinets and a dropped ceiling.  Extending the wall between the inglenook and the door all the way up to the ceiling would further enhance the sense of shelter.
0 Comments

Five Ways to Design a New Home for a Sloping Site

9/27/2017

0 Comments

 
Picture
Building a home on a flat property is pretty straightforward; building on a property that slopes gives you the opportunity to be more creative in the way your home meets the earth.  Below are five ways you can deal with your sloping site.

FLATTEN THE SITE
​I believe that this is the least desirable way to deal with a sloping site.  If done poorly, it can make the site look awkwardly unnatural, and the additional grading adds to the cost of the project.  It's better to find a home design that works well with the natural lay of the land, or find a different site that works well with the home design you want to use.
​
​
CHANGE THE GRADE SELECTIVELY
Changing the grade selectively can help a home fit into its site and even improve the site if done thoughtfully.  In the example shown in the two photos below, the east (left) wall of the garage is nestled into the side of the hill, but the grade between the garage and house was lowered for better access to the back yard.  Stone retaining walls make the regrading possible and are a beautiful visual feature as well.
​
Picture
Picture


​MODERATE SLOPE - USE 1/2 LEVELS
A moderately sloping site may mean that there is less than a full level change between front and back.  In the example below, the great room (on the left) is a half level below the front entry (on the far right), reflecting the natural grade change between front and back yards.

Picture


​
STEEPER SLOPE - WALKOUT BASEMENT
The walkout basement is a common feature of houses that have a steep enough grade difference that the back side of the house is a full level lower than the front side of the house.  Below are two examples.
Picture
Picture


HOUSES THAT DO THEIR BEST TO TRULY BLEND IN:  BERMED AND EARTH-COVERED HOMES
​
The two homes below take the concept of fitting into their sites even further.  In both cases, much of the building sits below the natural grade.

The first home shown below is heavily beamed into the earth.  Driving up to it from the road, there is little more than roof visible until you walk down the exterior steps to the front door at the side of the house. (Photos 1 and 2.  Home designed by Owner)

The third photo shows a home that takes this idea even further.  It is not only bermed into the side of the hill, but the lower level roof is underground, rather like a Hobbit home.  The retaining wall on the left side of the photo is actually part of the lower level roof, and the strip of lawn in the middle of the photo sits on top of the lower level roof.  (Home designed by architect Herb Gausewitz)

Picture
Picture
Picture
0 Comments

The Aging-Friendly Bathroom

8/3/2017

0 Comments

 
As I work more and more with Baby Boomers, I find that a lot of people are interested in features which will make it easier to stay in their own homes as they age.  Whether currently suffering from decreased mobility or wanting to be prepared in case they find themselves wheelchair-bound in the future, my retired or about-to-retire clients are often asking for handicap accessible bathrooms, particularly showers that can be used by someone with limited mobility. 
Picture
The photograph above shows a shower that I designed for a couple who were experiencing health problems, which they expected to worsen over time.  The picture shows that an easy-to-use shower can be beautiful as well as functional.  This type of shower, with no threshold and a tiled floor surface that runs continuously from the bathroom into the shower, is the gold standard when it comes to wheelchair-accessibility.  The shower floors are sloped to  the linear drain running down the center of the shower.  In this case, the shower is long enough to contain most of the water inside without the use of a shower curtain.  Smaller showers will generally use a curtain to keep water from splashing onto the floor outside the shower.

In this case, the shower was designed to be used by someone sitting on the built-in bench (visible in the middle of the photo).  The hand-held showerhead is on a bar so that it can be adjusted up or down to suit the needs of the user, and shower controls are located within easy reach of the bench.  This shower also contains a rain head showerhead on the ceiling for the benefit of standing users.  
Picture
A light within the shower is a good idea, particularly for seniors, who need more light to see than younger people.

Although relatively easy to build into a new bathroom, this type of shower is trickier to build when remodeling an existing bathroom, since the existing floor joists need to be cut or replaced in order to create a recess for the shower.  In remodeled bathrooms, a prefabricated fiberglass handicap accessible shower is an alternative which can be added without changing the existing floor structure, although these generally have a small (approximately 1") lip to keep water in the shower, which makes it a little more difficult to get into and out of the shower.  

If a homeowner wants to be prepared for the possibility of future grab bars but does not want to install them now, blocking can be added behind the shower wall, making it easier to install bars later without damaging the walls.
Picture
The floor plan above shows a bedroom addition that I designed recently which considers every aspect of the the spaces to make them more wheelchair-friendly.  The shower can be used either from a wheelchair or a stool.  The large interior dimensions of the shower stall make it big enough to roll a wheelchair into, but the user could also transfer from their wheelchair onto a stool placed inside of the shower, keeping the wheelchair dry.  The shower controls are located so that they can be accessed outside of the shower, making it possible for  the user to turn the shower on without getting wet while waiting for the water to heat up.

Other accessibility features shown in the plan include grab bars at the side and back of the toilet, a 5' diameter clear space within the bathroom and the closet for ease of turning in a wheelchair, a sink and counter with space underneath for a sitting person to pull up under them and the location of switches and outlets so that they can be reached by someone in a wheelchair.  In addition there is an exterior door and ramp directly from the bedroom to the front yard.
Picture
The interior elevation above shows the following wheelchair-friendly features:  leg room under the sink, a "comfort height" toilet with grab bars, a mirror and electrical outlet located just above the backsplash and a linen closet with lower-level drawers.
0 Comments
<<Previous

    RSS Feed

    Categories

    All
    Essentials
    Good To Know
    Projects
    Working With An Architect

    Archives

    October 2025
    August 2025
    July 2025
    May 2025
    April 2025
    January 2025
    November 2024
    October 2024
    September 2024
    July 2024
    June 2024
    April 2024
    February 2024
    November 2023
    July 2023
    May 2023
    March 2023
    February 2023
    November 2022
    October 2022
    September 2022
    August 2022
    June 2022
    April 2022
    March 2022
    January 2022
    November 2021
    September 2021
    July 2021
    June 2021
    May 2021
    April 2021
    March 2021
    February 2021
    December 2020
    November 2020
    October 2020
    May 2020
    April 2020
    March 2020
    January 2020
    November 2019
    October 2019
    August 2019
    July 2019
    June 2019
    May 2019
    April 2019
    March 2019
    January 2019
    December 2018
    November 2018
    September 2018
    May 2018
    February 2018
    January 2018
    December 2017
    October 2017
    September 2017
    August 2017
    June 2017
    May 2017
    April 2017
    March 2017
    February 2017
    January 2017
    December 2016
    November 2016
    October 2016
    September 2016
    August 2016
    July 2016
    June 2016
    May 2016
    April 2016
    February 2016
    December 2015
    November 2015
    September 2015
    August 2015
    June 2015
    May 2015
    April 2015
    March 2015
    February 2015
    December 2014
    November 2014
    September 2014
    July 2014
    May 2014
    March 2014
    December 2013
    August 2013
    July 2013
    April 2013
    March 2013
    February 2013
    January 2013
    December 2012
    November 2012
    October 2012
    September 2012
    August 2012
    July 2012
    June 2012
    May 2012

Remodeling and Home Design
 © 2015  /  Julie Kardatzke Architect, LLC  /  408 W. Leeson Street, Spring Green, WI  53588   /   608.588.7105  /  [email protected]
Picture